Web Dev Bootcamp ∙ Learn HTML
Hieu Nguyen · May 01, 2020 · 7 min read
0
0 leave some love!
What is HTML
HTML is a Hyper Text Markup Language that tells the browser how our website is layed out. It describes the structure and the elements in our webpage. A typical button is represented as
Goal
Understand the basics of HTML
This section will not cover everything there is to know about HTML because you don’t need to know everything to be successful.
It will just cover the basics and just enough to get you started
Setup
You need a code editor to write your code in. I prefer vs code, but feel free to use any editor you like.
As a good coding practice, always start your project by creating a project folder. This helps to organize your code. For the purpose of this bootcamp, we are going to have one master folder to store all of our codes, and create nested folders if we feel the need to separate things.
create a folder named something along the line of “WebDevBootcamp”
Mac and Linux:
mkdir WebDevBootcampNote: Here I am using a bash command to create the folder. I will go into more depth later about bash commands.
Window:
just use your file explorer to create the folder.
Creating your first HTML file
- inside of the “WebDevBootcamp” folder, create another folder called “learn-HTML” or anything else you want to call it.
- inside the “learn-HTML” folder, create an HTML file
index.html. Here “index” is the name of the file and “.html” is the file type -
Add boiler plate. A HTML file contains a set of tags. There are two types of tags:
- Opening and closing tags:
<html></html> - Self closing tags:
<img/>. Self-closing tags do not need an additional closing tag
- Opening and closing tags:
<!DOCTYPE html>
<html>
  <head>
    <title></title>
  </head>
  <body></body>
</html>
The <html></html> tag is used to wrap our entire HTML file
inside the HTML file, we have two element <head></head> and <body></body> The head contains meta data and scripts tags that the browser runs when we load the HTML file. The body contains the content of our HTML page
-
Lets add a title
- Inside the
<title></title>, add a title =><title>Dogs are Great!</title> - To view your HTML file, the easiest way is to drag and drop it anywhere inside your google chrome browser.
- Inside the
Congrats! you have officially created your very first HTML file.
Elements
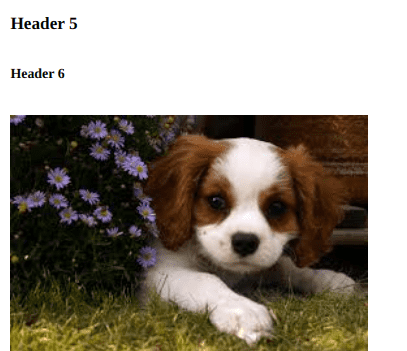
<body></body>- contains the content that will appear on the webpage<title></title>- storing the title of the webpage<h1></h1>- headers are large text usually used for article titles and titles. There is also h2, h3, h4, h5, h6 tags
<p></p>- paragraph
Attributes
Attributes are like special properties that you pass to an HTML tag to alter its functionality or how it is displayed
Ex.
<img src="cutedog.jpeg" alt="cute dog" />here the src is the location of the image and alt is the text that will appear if the image failed to load
Here are a list of common attributes that
- disabled - if true, then the element is disabled
- href url to another website
- id id of an element
- src url of image location
- style - styling an element
- title -tooltip when you hover an element
Styling
styling allows you to customize the look of an element
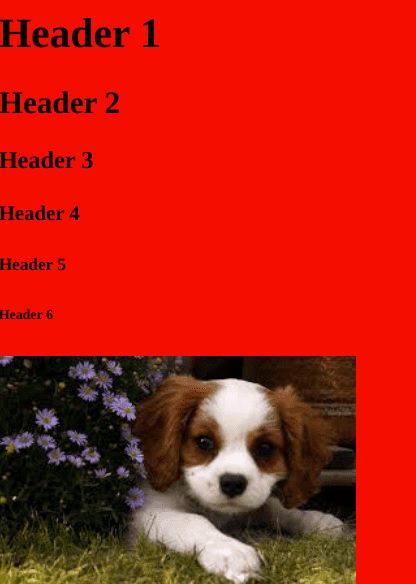
<body style="background:red;"></body>here we gave the body a style attribute and gave it the style background:red; which will make the background red
Comments
comments are little notes to yourself, but do not show up on the webpage
<!-- Dogs are awesome! -->Links
use an anchor tag <a></a> and provide a href
<a href="http://google.com">google</a>Table
<table>
  <tr>
    <th>name</th>
    <th>favorite food</th>
  </tr>
  <tr>
    <td>Bob</td>
    <td>Donuts</td>
  </tr>
  <tr>
    <td>Sara</td>
    <td>Ice cream</td>
  </tr>
</table>
here is what it looks like:
| name | favorite food |
|---|---|
| Bob | Donuts |
| Sara | Ice cream |
List
Ordered List
<ol>
  <li>item 1</li>
  <li>item 2</li>
  <li>item 3</li>
</ol>
here is what it looks like:
- item 1
- item 2
- item 3
Unordered list
<ul>
  <li>item 1</li>
  <li>item 2</li>
  <li>item 3</li>
</ul>
here is what it looks like:
- item 1
- item 2
- item 3
Block
Blocks are like containers for a group of related elements.
<div>
  <h1>This is a container for my cookie</h1>
  <p>flavor: chocolate</p>
</div>
here is what it looks like:
This is a container for my cookie
flavor: chocolate
Classes, id, and names
These are typically identifiers that helps add specificity to an element. for instance, <div class="dog animal">Woof</div> and <div class="cat animal">Meow</div> are div. One with class “dog” and the other “cat”, and they both have class “animal”
Note: you can assign more than one class to an element by separating them with a space
Having this specificity is useful when you want to target a specific element by its class and style it a specific way without affecting other similar elements
Ranking by specificity, id is the most specific, follow by class, and finally name
Form and inputs
A form is how to obtain data from the users. A form will typically consists of one or more inputs and a submit button
<form action="/receive-form" method="POST">
  <input type="text" id="name" placeholder="Enter your name" />
  <label for="name">Name:</label>

  <input type="email" id="email" placeholder="enter your email" />
  <label for="email">Email:</label>

  <input type="password" id="password" placeholder="enter your password" />
  <label for="password">Password:</label>

  <button type="submit">submit</button>
</form>
Here we have three inputs. a text input for the name, an email input, and a password input. We also have a submit button. When the user clicks submit a POST request will be sent to the /receive-form route on the server
More information
What’s next
Start learning CSS


